Let's make a Pumpkin!
It's easy to make a delicious round pumpkin!
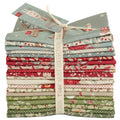
It pairs well with butternut squash, especially when made with fabric from the Creating Memories Fall Collection in fall and Thanksgiving hues.
Pumpkins are available in three sizes: small, medium, and large.
Here we explain the large size in detail.
For the medium and small sizes, you will need to use slightly smaller fabric, so please refer to the pattern.
→ Download the pattern
<Ingredients for large pumpkin>
- ・8 pieces of pumpkin dough (various sizes: 10.2cm x 33cm)
- ・1 piece of fabric for the stem (19cm x 12.7cm)
- ·cotton
- - Wooden stick for stuffing
- ・Doll needle
- ・Embroidery thread
<Finished pumpkin size (approximate)>
- Small: 15cm x 13cm
- Medium: 17cm x 15cm
- Large: 17cm x 19cm
<Notes>
- Please read all project instructions carefully before beginning work.
- - When copying the pattern, use thick paper and make sure the pattern is life-size.
- - The solid lines on the pattern are sewing lines. This allows you to add your own seam allowances.
- - When sewing, keep the stitch length to 1.5mm to 1.6mm.
- To create a neat shape, make cuts in the areas where the seam allowance curves sharply inward. - -After turning it inside out, pull the wooden stick along the inside of the seam, firmly pressing out all wrinkles and creases before ironing.
- - Stuff it tightly with cotton, using a stick to stuff the smaller areas.
- - Use small blind stitches with a matching thread to sew any gaps together.
<How to make a pumpkin>
Trace the full-size pattern onto cardboard and cut out the shape. Prepare 8 different pieces of fabric for the pumpkins and trace the overall shape of the pumpkin onto each piece. Cut out the shape and add a 6mm seam allowance before cutting.
Next, arrange the eight pieces of fabric in any order you like. Take the first two pieces of fabric and fold them over with the right sides facing inwards (Figure A). Sew along the long sides, starting and ending at the start and end points of the marked shapes. Repeat with the other three pairs.
③
Next, sew the pairs together, beginning and ending at the end and beginning of the seam. At the last seam, leave a gap in the straight part to turn it right side out. Turn the pumpkin right side out and stuff it securely. Finally, sew the gap together by hand (Figure B).
④
To make the ball into a pumpkin shape, thread a dole needle with embroidery thread. Tie a large knot at the end of the thread. Thread the needle from the top to the bottom of the pumpkin and back up again. Pull the thread tight, creating indentations at the top and bottom of the pumpkin to give it a squashed shape. Then tie a knot tight.
⑤
To make the stem, take a piece of fabric, fold it in half with the right side inwards and press (Fig. C 1). Mark the stem pattern and sew the shape with about 1.6 short stitches. Cut out with a small seam allowance and notch the inner curve. Turn it right side out, fold the excess seam allowance inwards and press to shape (Fig. C 2). Use a wooden stick to stuff the stem. Sew around the opening and pull the thread up to form a tight neck.
⑥
Press the bottom of the stem into the indentation at the top of the pumpkin and use pins to create a round shape as shown in Figure D. Then hand sew the stem to the pumpkin to complete the design.


